


Minimal Setup of a DataPower X2 Appliance [by R George Inness]
Your company has just bought DataPower X2 appliances. The datacenter that they will be installed in is remote and you have been asked to put together a plan to remotely do their setup. This article will provide instructions and guidance on what is needed for a minimal setup to get the appliance on your network and accessible via the DataPower WebGUI.
DataCenter Prerequisites
- DataPower appliance
- Installed in a rack
- Ethernet cables plugged in.
- If your DataCenter has a Serial over LAN like Cyclades, the Cyclades cable is plugged in and the baud rate is set 115200. This is a change from XI52s, XG45s and XB62s.
- Laptop
- USB Serial cable that came with the appliances.
- Program like PuTTY to initialize the appliance with the following values:
- Baud rate: 115200
- Data bits: 8
- Stop bits: 1
- Parity: None
- Flow control: None
- Refer to this technote for more information, https://www-01.ibm.com/support/docview.wss?uid=swg21663613
Required DataPower Appliance Setup Information
| Information Requested | Example | Actual Value |
|---|---|---|
| Port that will configured. | Values could be: mgt0, mgt1, eth10 | |
| IP Address of one of the ports. It must be in CIDR format. | 172.16.51.138/24 | |
| Gateway IP address of the above IP address | 172.16.51.2 | |
| Admin password. Recommend initially something simple. | admin123 |
Initializing the Appliance
Notes:
- The screen shots are from a virtual appliance. The prompts are the same except the interface name.
- The settings are not saved except the admin password until the license is accepted.
Power up the appliance to the login prompt
- With the following connections at a minimum:
- One ethernet connection
- Serial connection. Either through a Serial Console server or the USB Serial cable connected to a laptop.

Login into the appliance and go through the Startup Wizard
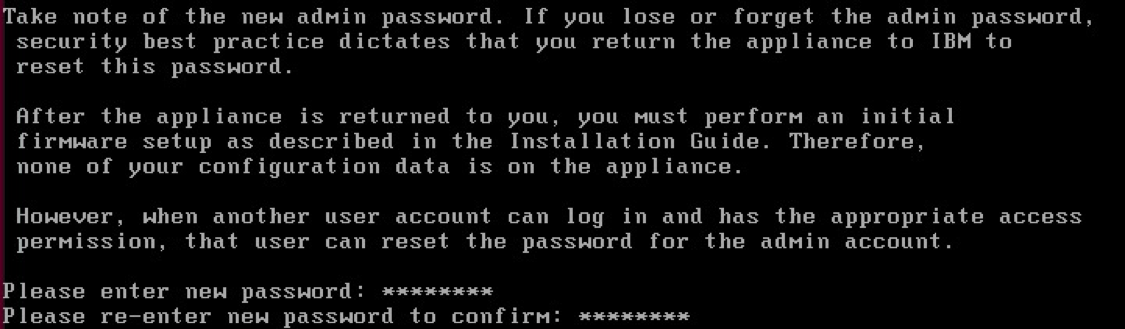
- The userID for logging into the appliance is admin with the password as admin
-
Decide whether or not to Enable Secure Backup mode. Note: This can be enabled after initialization is complete.
- Enable Secure Backup
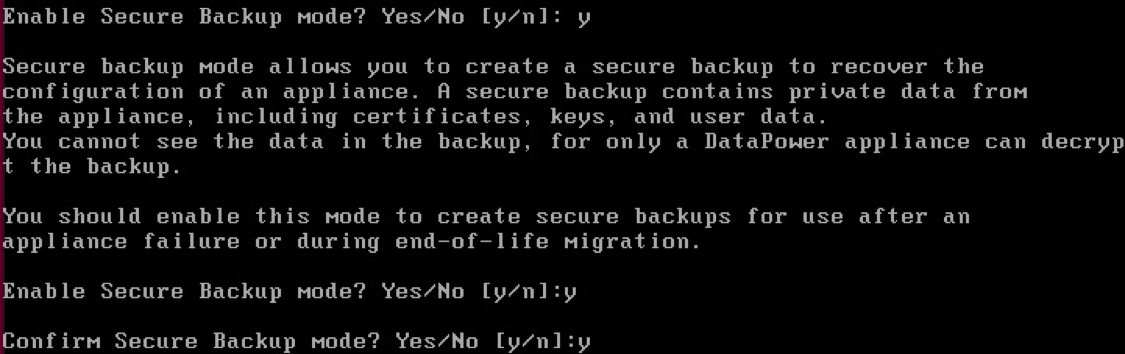
- Decide whether or not to Enable Common Criteria Compatibility mode. Note: Make this decision carefully as the only way to turn it off is to re-initialization the appliance back to the factory settings.

- Set the initial password for the appliance.
- Run the Install Wizard.

- Configure the agreed upon network interface.
- Unless the interface is being asked to configure, answer n. In the picture below, the Startup Wizard is asking for the eth0 interface.
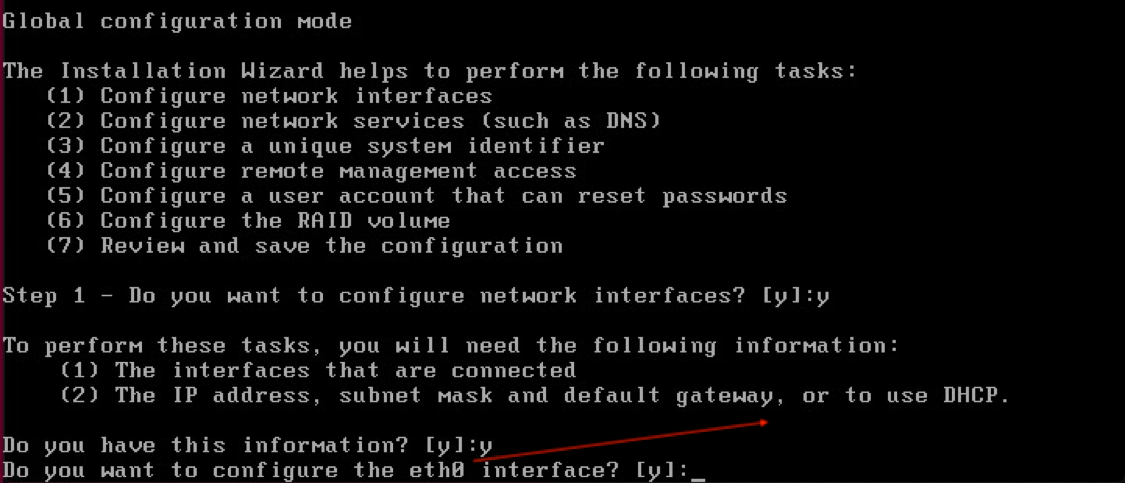
- Enter
nfor no to enable DHCP. - Input the IPv4 address for the interface in CIDR format.
- Input the IPv4 address for default gateway.

- Select
nto the remaining interfaces. - Enter
nfor no until you get to the RAID drive step, Step 6.
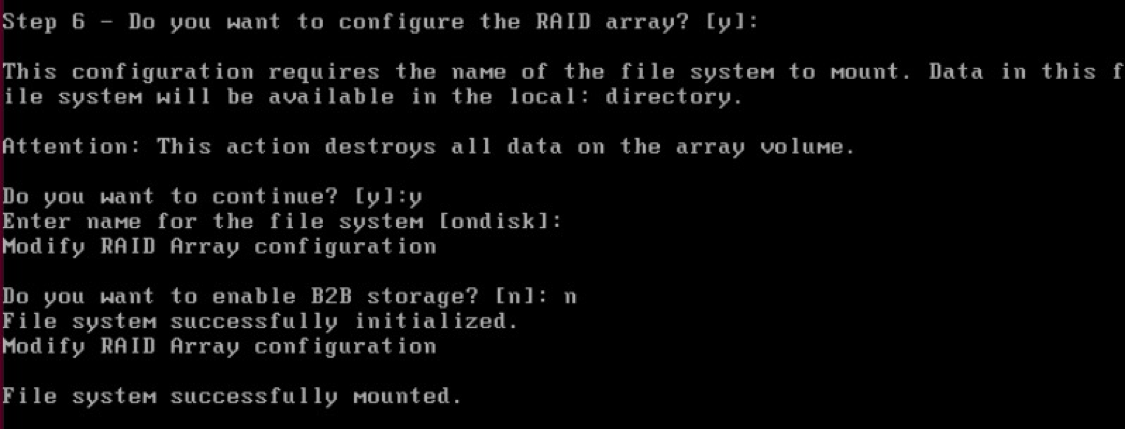
- Enter
yfor yes to configure the RAID array - Enter
yfor yes to continue - Enter the name for the file system. The default is ondisk.
-
Determine whether or not to enable B2B storage. If you are not installing the B2B Module, Enter
nfor no as the answer to this should be no. Otherwise, Enteryfor yes. - Enter
nfor no to review the current configuration - Enter
yfor yes to save the configuration - Enter
yfor yes to overwrite the previously saved configuration

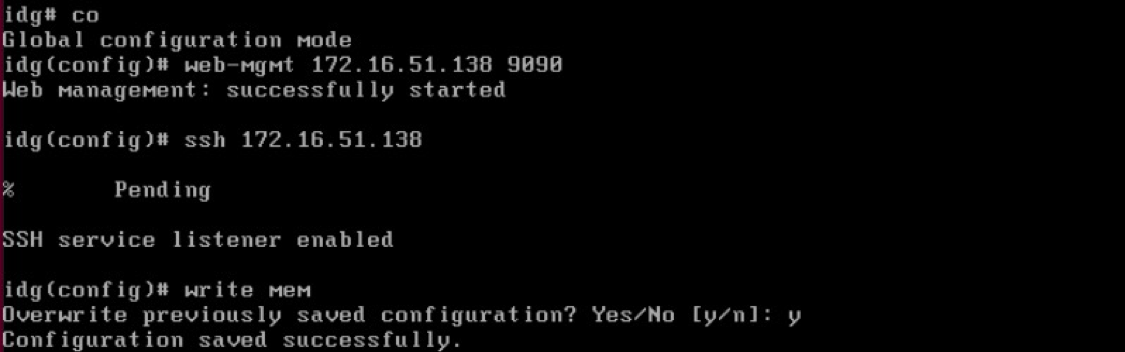
- Enter
coto enter the configuration mode. - Enter
web-mgmt <<IP address>> 9090to start the Web-GUI where IP address is the IP address of the interface configured earlier. - Enter
ssh <<IP address>>to start SSH where IP address is the IP address of the interface configured earlier. - Enter
write memto save the configuration. - Enter
yto overwrite the previously saved configuration.
- Enter
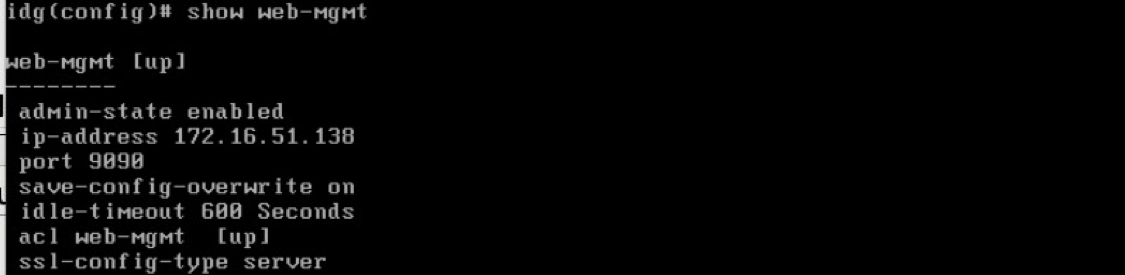
show web-mgmtto verify the Web GUI is up and running.
- Enter
exitto exit the configuration mode. - Enter
show sshto verify SSH is up and running.

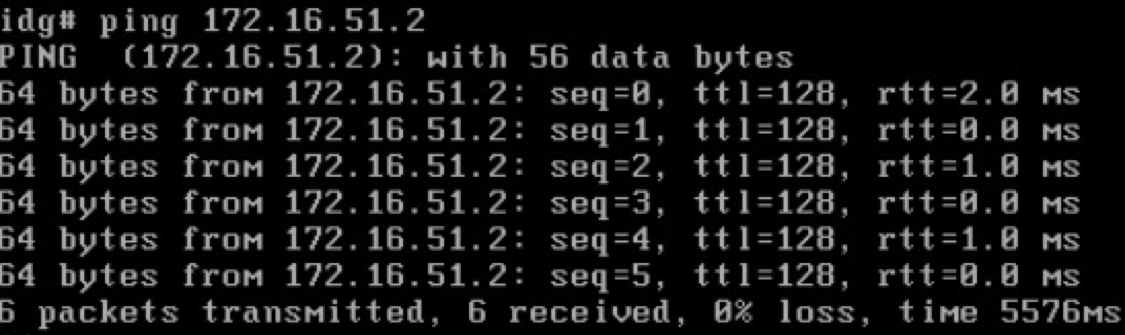
- Ping the gateway for the interface configured earlier.
- Log into the Web GUI with the URL of
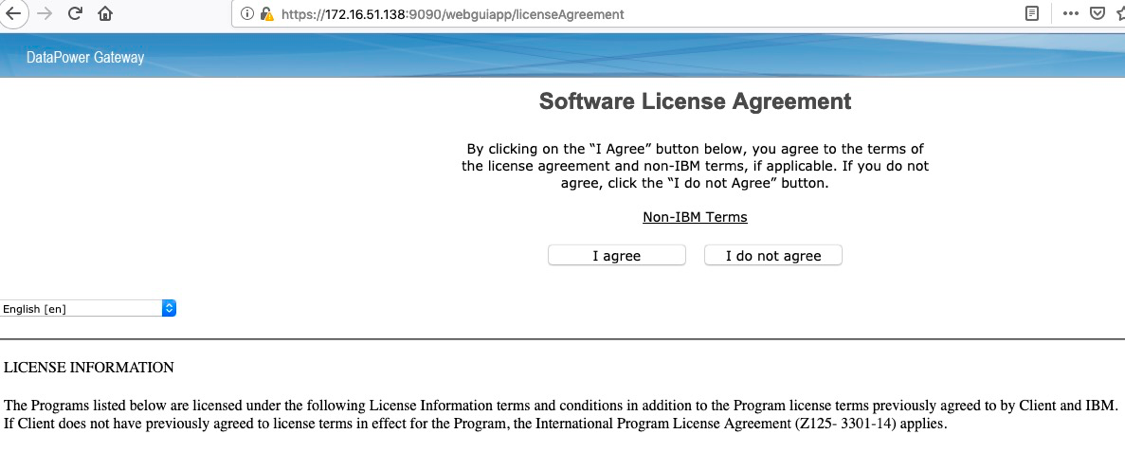
https://<<IP address>>:9090where IP Address is the interface configured earlier.
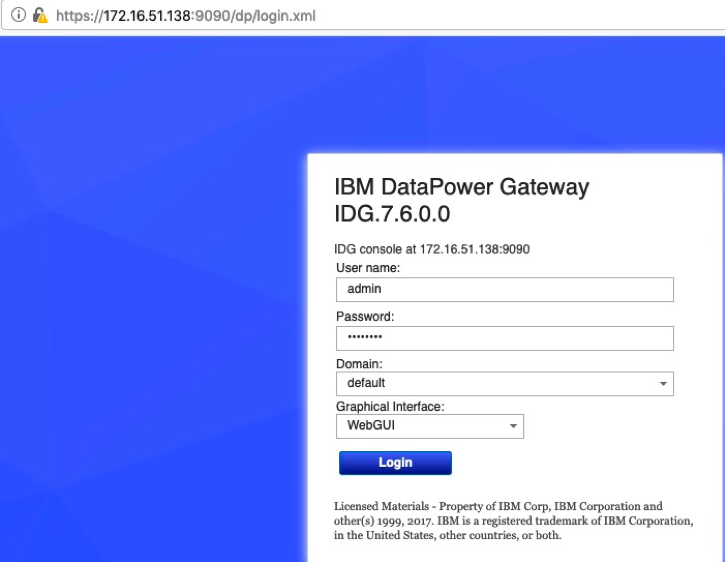
- Accept the DataPower from the Web GUI by pressing I agree.
- The appliance will reboot.
Congrats you have configured the DataPower appliance to allow the other teams to do more configuration and setup.