

Building a Reverse Proxy for the IBM Developer Portal with IBM DataPower
• • by
•
Chris Phillips

•
Simon Kapadia
The IBM Developer Portal is essential for socialising your APIs to external consumers. In order to do this it must be accessible outside of your Internal Network. It is not good practice to deploy the Developer Portal directly in your DMZ and grant users direct access. The De-Militarised Zone (DMZ) is designed to be a hostile, barren place for attackers; software deployed there should have minimal function, deployed on a hardened platform, and be designed for DMZ deployment. With this in mind, we suggest that that a reverse proxy should be deployed in your DMZ, which forwards requests to the Developer Portal, and the Developer Portal should in turn be deployed in a separate secure zone designed for servers (not directly on your internal lan!). One option for a reverse proxy implementation would be to use IBM DataPower, which has facilities to provide a reverse proxy within its WAF capabilities. This article will explain how to configure a WAF as a Reverse Proxy for the Developer Portal on a Physical, Linux-based or Virtual DataPower. This can also be done with DataPower in Kubernetes but the configuration needs to be placed in a ConfigMap and that will be not be covered by these instructions.
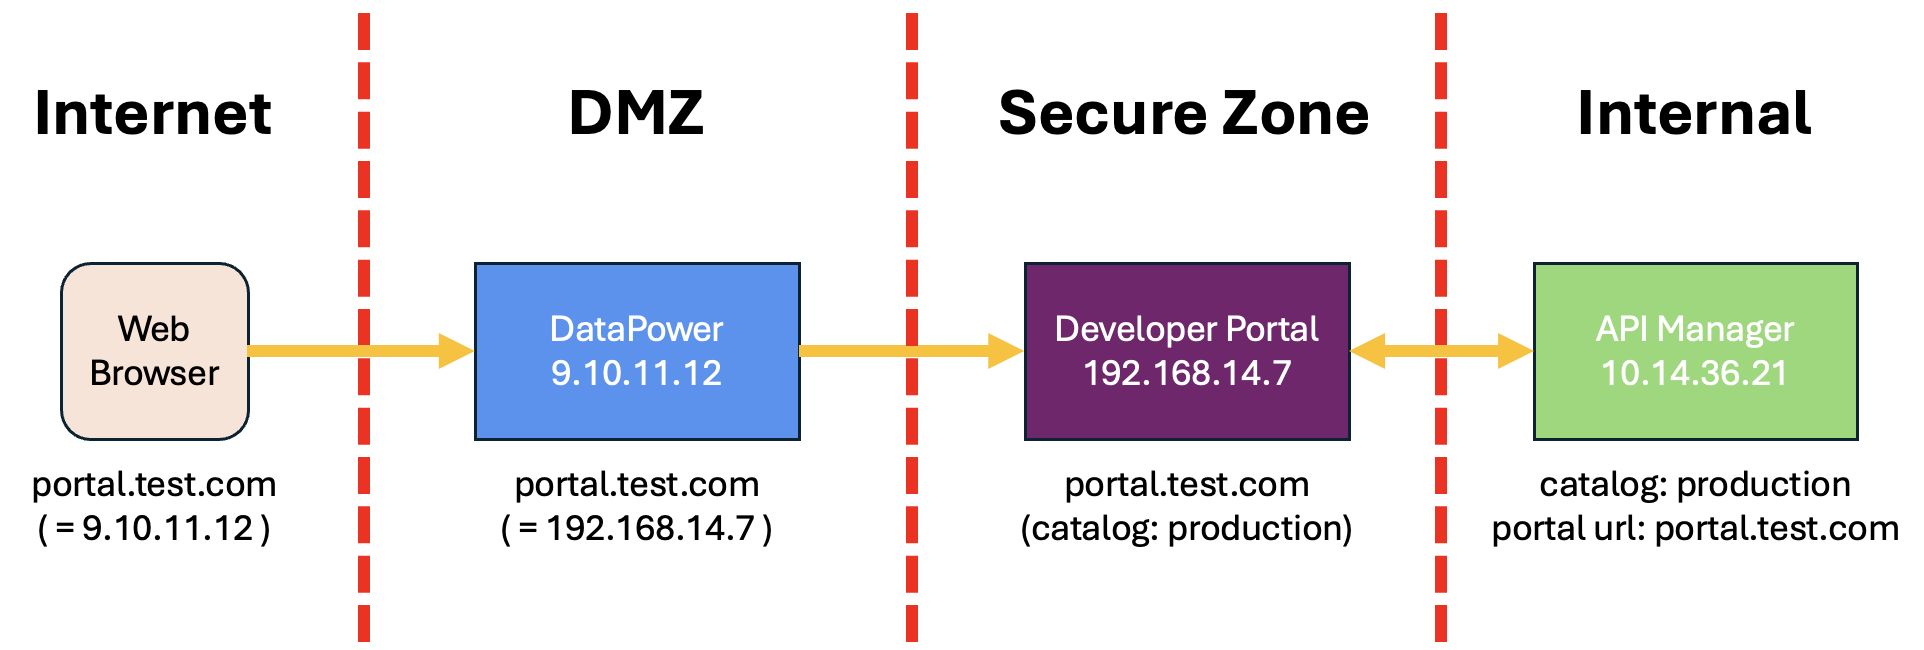
A request will come from the Web Browser into IBM DataPower, and this will then be forwarded to the Developer Portal pods, using the same URL all the way through.
IMPORTANT NOTE: Any reverse proxy placed in front of the Developer Portal must be completely transparent to the Developer Portal. We do not support any modification of the portal URL, port, hostname or path in the reverse proxy, as per the documentation. See https://www.ibm.com/docs/en/api-connect/10.0.8?topic=deployment-firewall-requirements
Here is what must be configured. The company test.com are setting up their production Portal. There is exactly one Portal URL, portal.test.com, which is the same everywhere:
- specified in the API Manager when deploying the Portal
- on the Portal Server itself
- in the DataPower WAF configuration
- typed into the client browser
This URL is the same everywhere. However, DNS is configured such that for external clients, the portal URL resolves to the DataPower endpoint IP address (in this instance 9.10.11.12), and on DataPower internal DNS or a Host Alias is used such that the portal URL resolves to the Developer Portal server endpoint IP address (in this instance 192.168.14.17).
Important Note: The IBM Developer Portal site address must be correctly configured when the site is deployed in the Catalog. As mentioned above, we do not support rewriting the site hostname in the reverse proxy, so the site address configured in the Portal must exactly match (be identical to) the address entered in the browser. What this means is that you cannot have an “internal Portal URL” and an “external Portal URL” for the Portal instance. There is one Portal URL and it is the same everywhere. In practice, for this to work, DataPower has to resolve the site hostname to the IP of the actual Portal server, but clients must resolve the hostname to the external IP being served by DataPower.
Assumptions
- DataPower will use a different DNS server as the external request. When the DataPower resolves the IBM Developer Portal Site hostname it will be directed to the IBM Developer Portal instance inside the network.
- The Developer Portal site address is not the default and does not use the default hostname.
- TLS Certificates and Keys are available and the Identification Credential Object is already created.
Configure the TLS Server Profiles
The TLS Client Profile is configured to handle the certificates for receiving calls. In this example we will configure the minimum, but additional options can be enabled to add additional security. This step
- Log into DataPower
- Go to the domain that will contain your Web Application Firewall
- Go to TLS Server Profile and click add
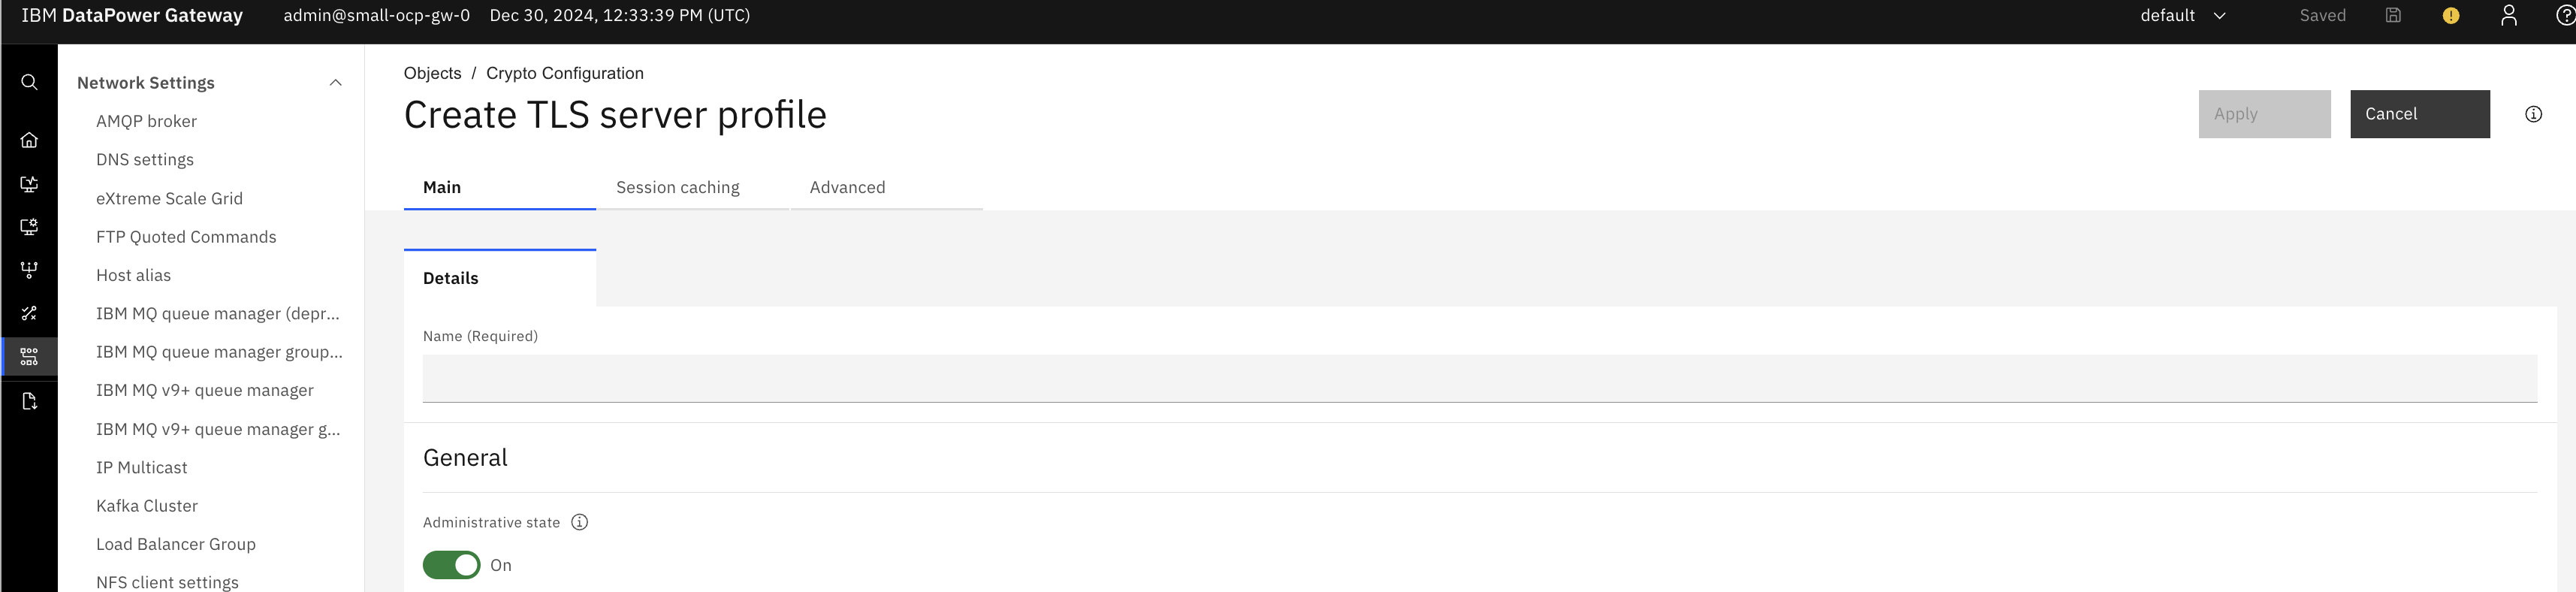
- Set the following
- Name - “Developer Portal WAF TLS Server Profile”
- Select the Identification Credential Object (already created, as described in the Assumptions).

- Click Apply.
Configure the TLS Client Profiles
The TLS Client Profile is configured to handle the certificates for making downstream calls. In this example we will configure the minimum, but additional options can be enabled to add additional security.
- Log into DataPower
- Go to the domain that will contain your Web Application Firewall
- Go to TLS Client Profile and click add
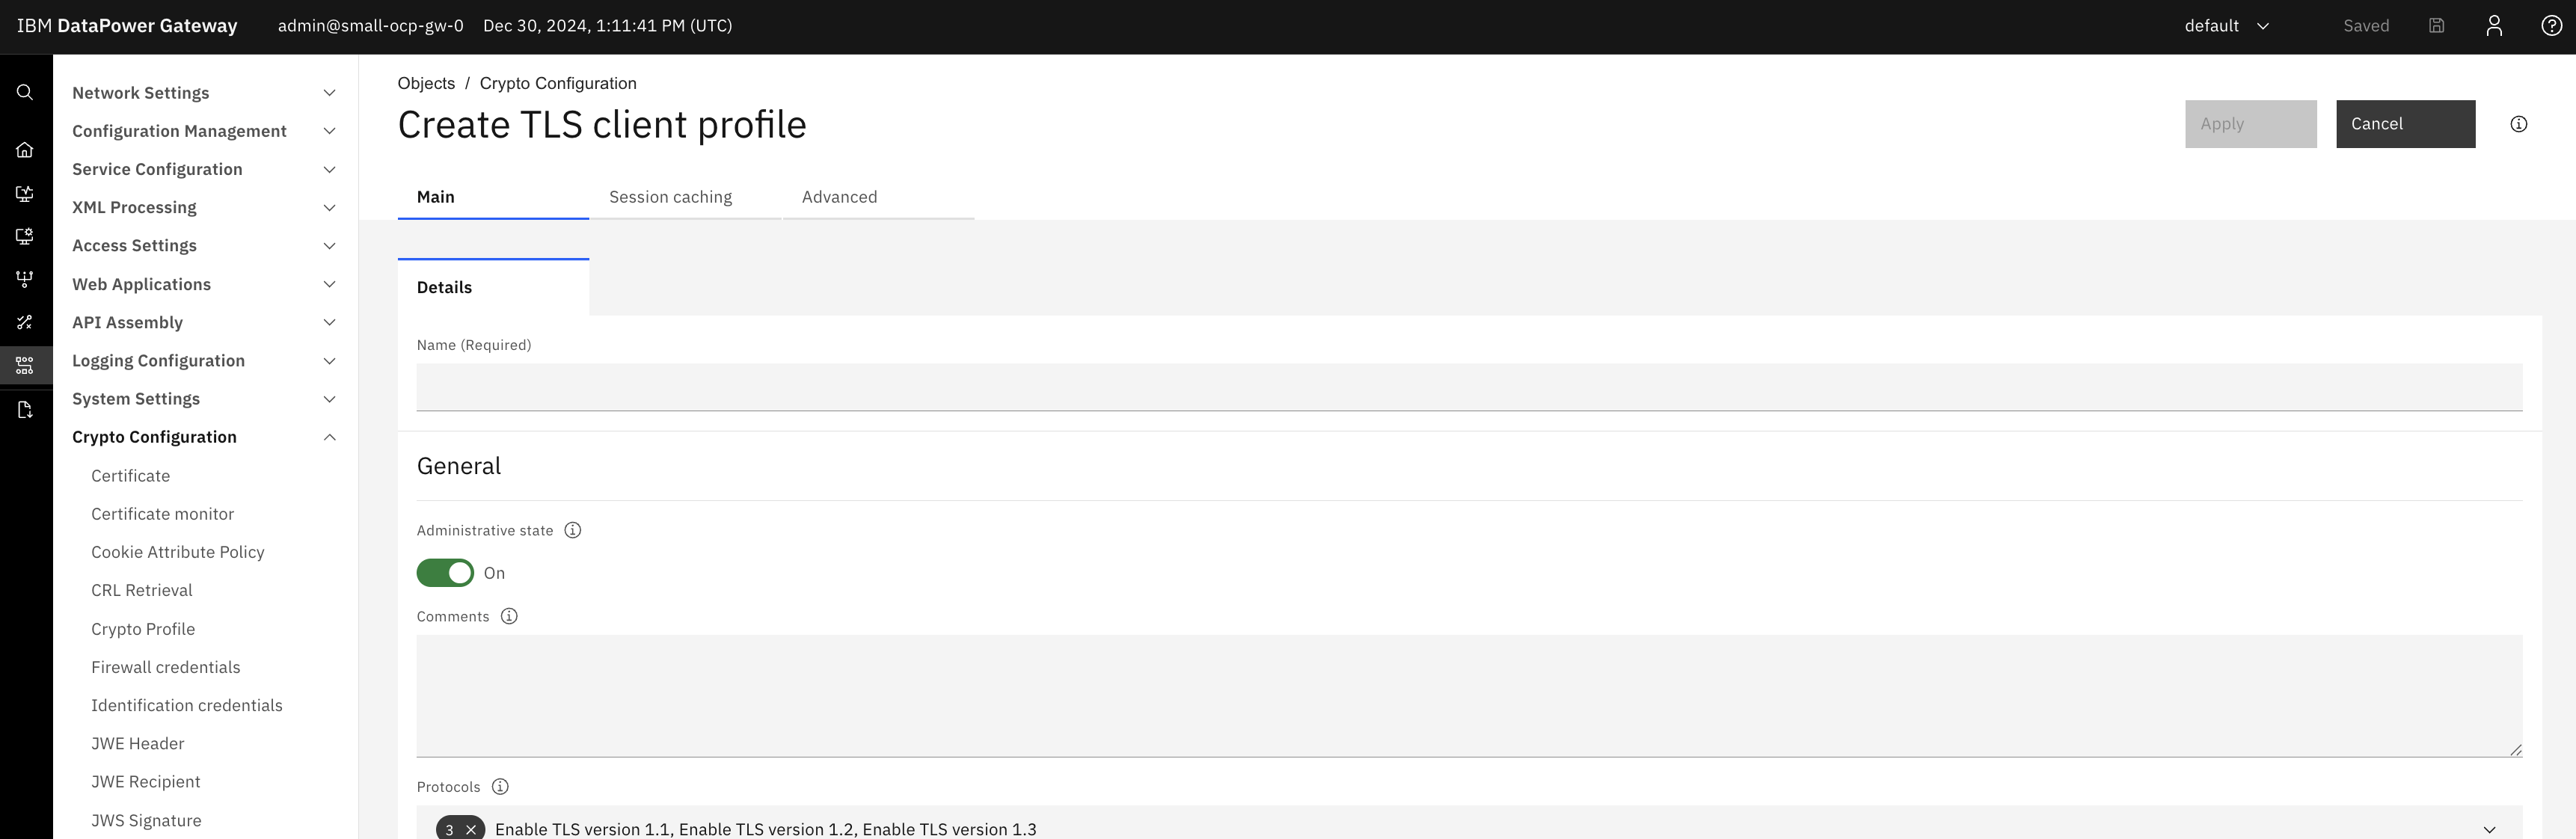
- Set the following
- Name - “Developer Portal WAF TLS Client Profile”
- Disable - “Validate server certificate” (note: do NOT disable this in a real world scenario!)

- Click Apply.
Configure the Application Security Policy
The Application Security Policy configures how the DataPower WAF should handle incoming requests. For the Developer Portal, we must simply pass through all requests unmodified, so we are going to create a policy which does that. However, this would be a good place to e.g. block specific known bad URL patterns, perform further verification of requests, send payloads to an ICAP server, etc.
- Log into DataPower
- Go to the domain that will contain your Web Application Firewall
- Go to Application Security Policy and click Add
- Set the following in Main
- Name - “Developer Portal WAF ASP”
- Set the following in Request Maps after clicking Add
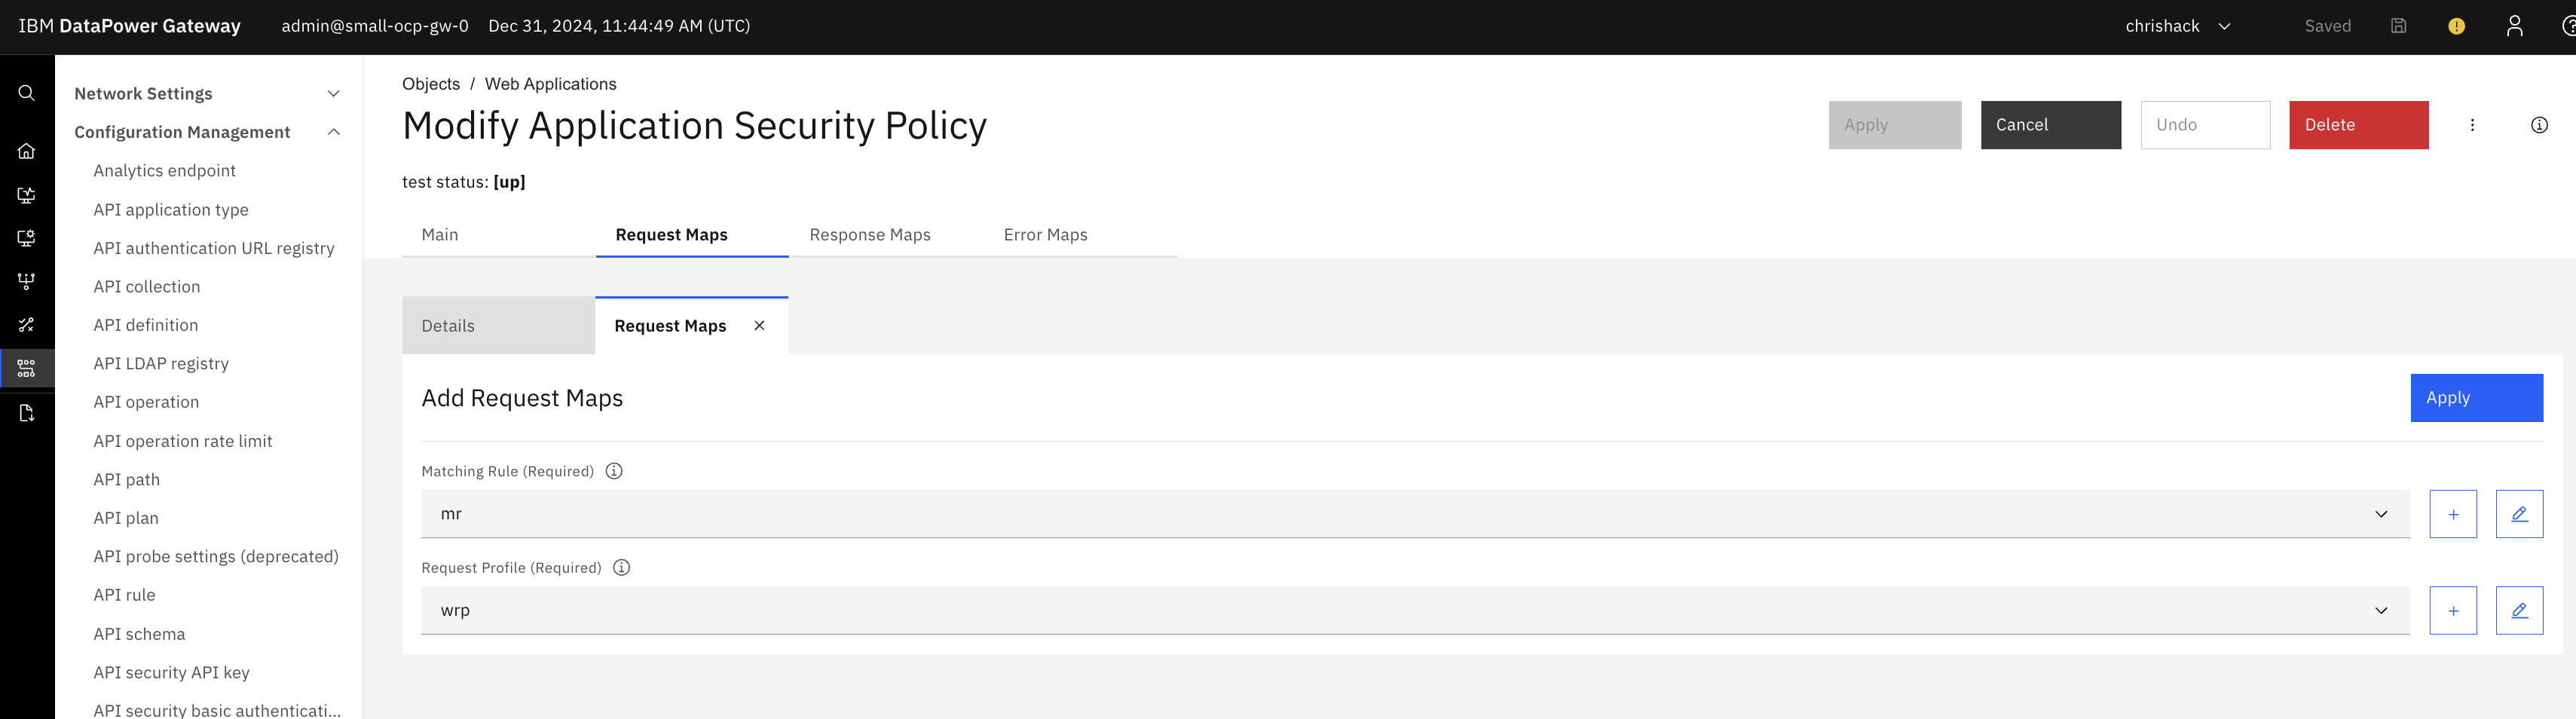 Create a new Matching Rule where the rule is of
- Matching Type - URL
- URL Match - *
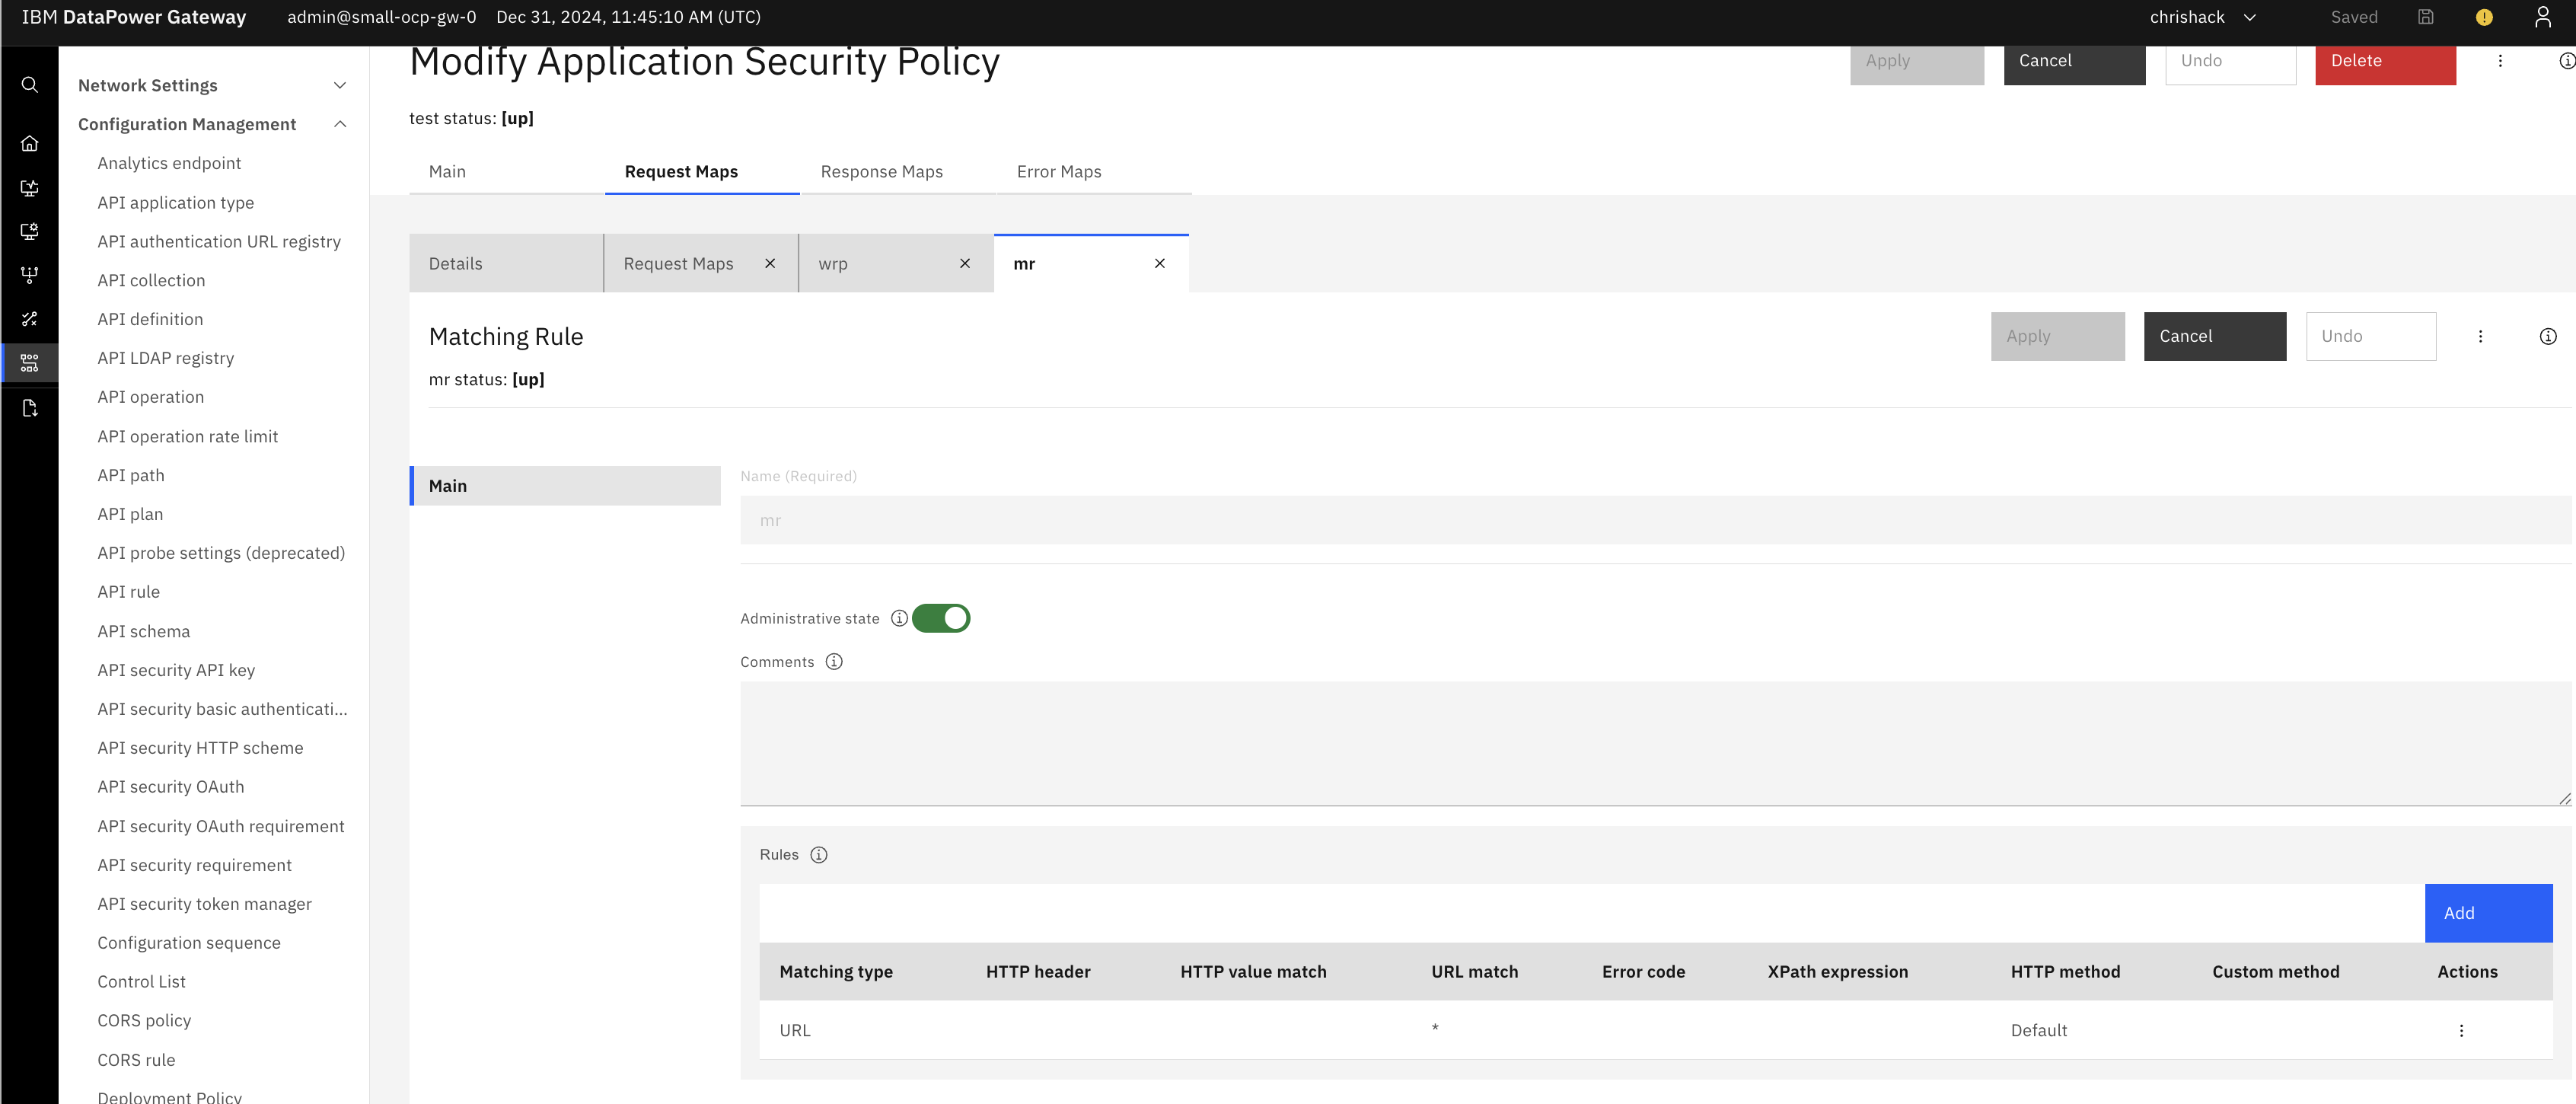 Click Apply to save the Web Request Map
Create a new Web Request Profile - Set Name to “Developer Portal WAF WRP” Click Apply to save the Web Request Profile
- Set the following in Response Maps after clicking Add
- Select the previously created Matching Rule. Create a new Web Response Profile
- Set Name to “Developer Portal WAF WRespP” Click Apply to save the Web Response Profile
- Click Apply to save the Application Security Profile
Configure the Web Application Firewall
The WAF handles the requests. WAFs have numerous configuration options which we will not cover here. This section will cover the basics to allow the WAF to function. If more advanced configuration is required please contact your local IBM Expert Labs team.
- Log into DataPower
- Go to the domain that will contain your Web Application Firewall
- Go to Web Application Firewall
- New
- Set the following in Main
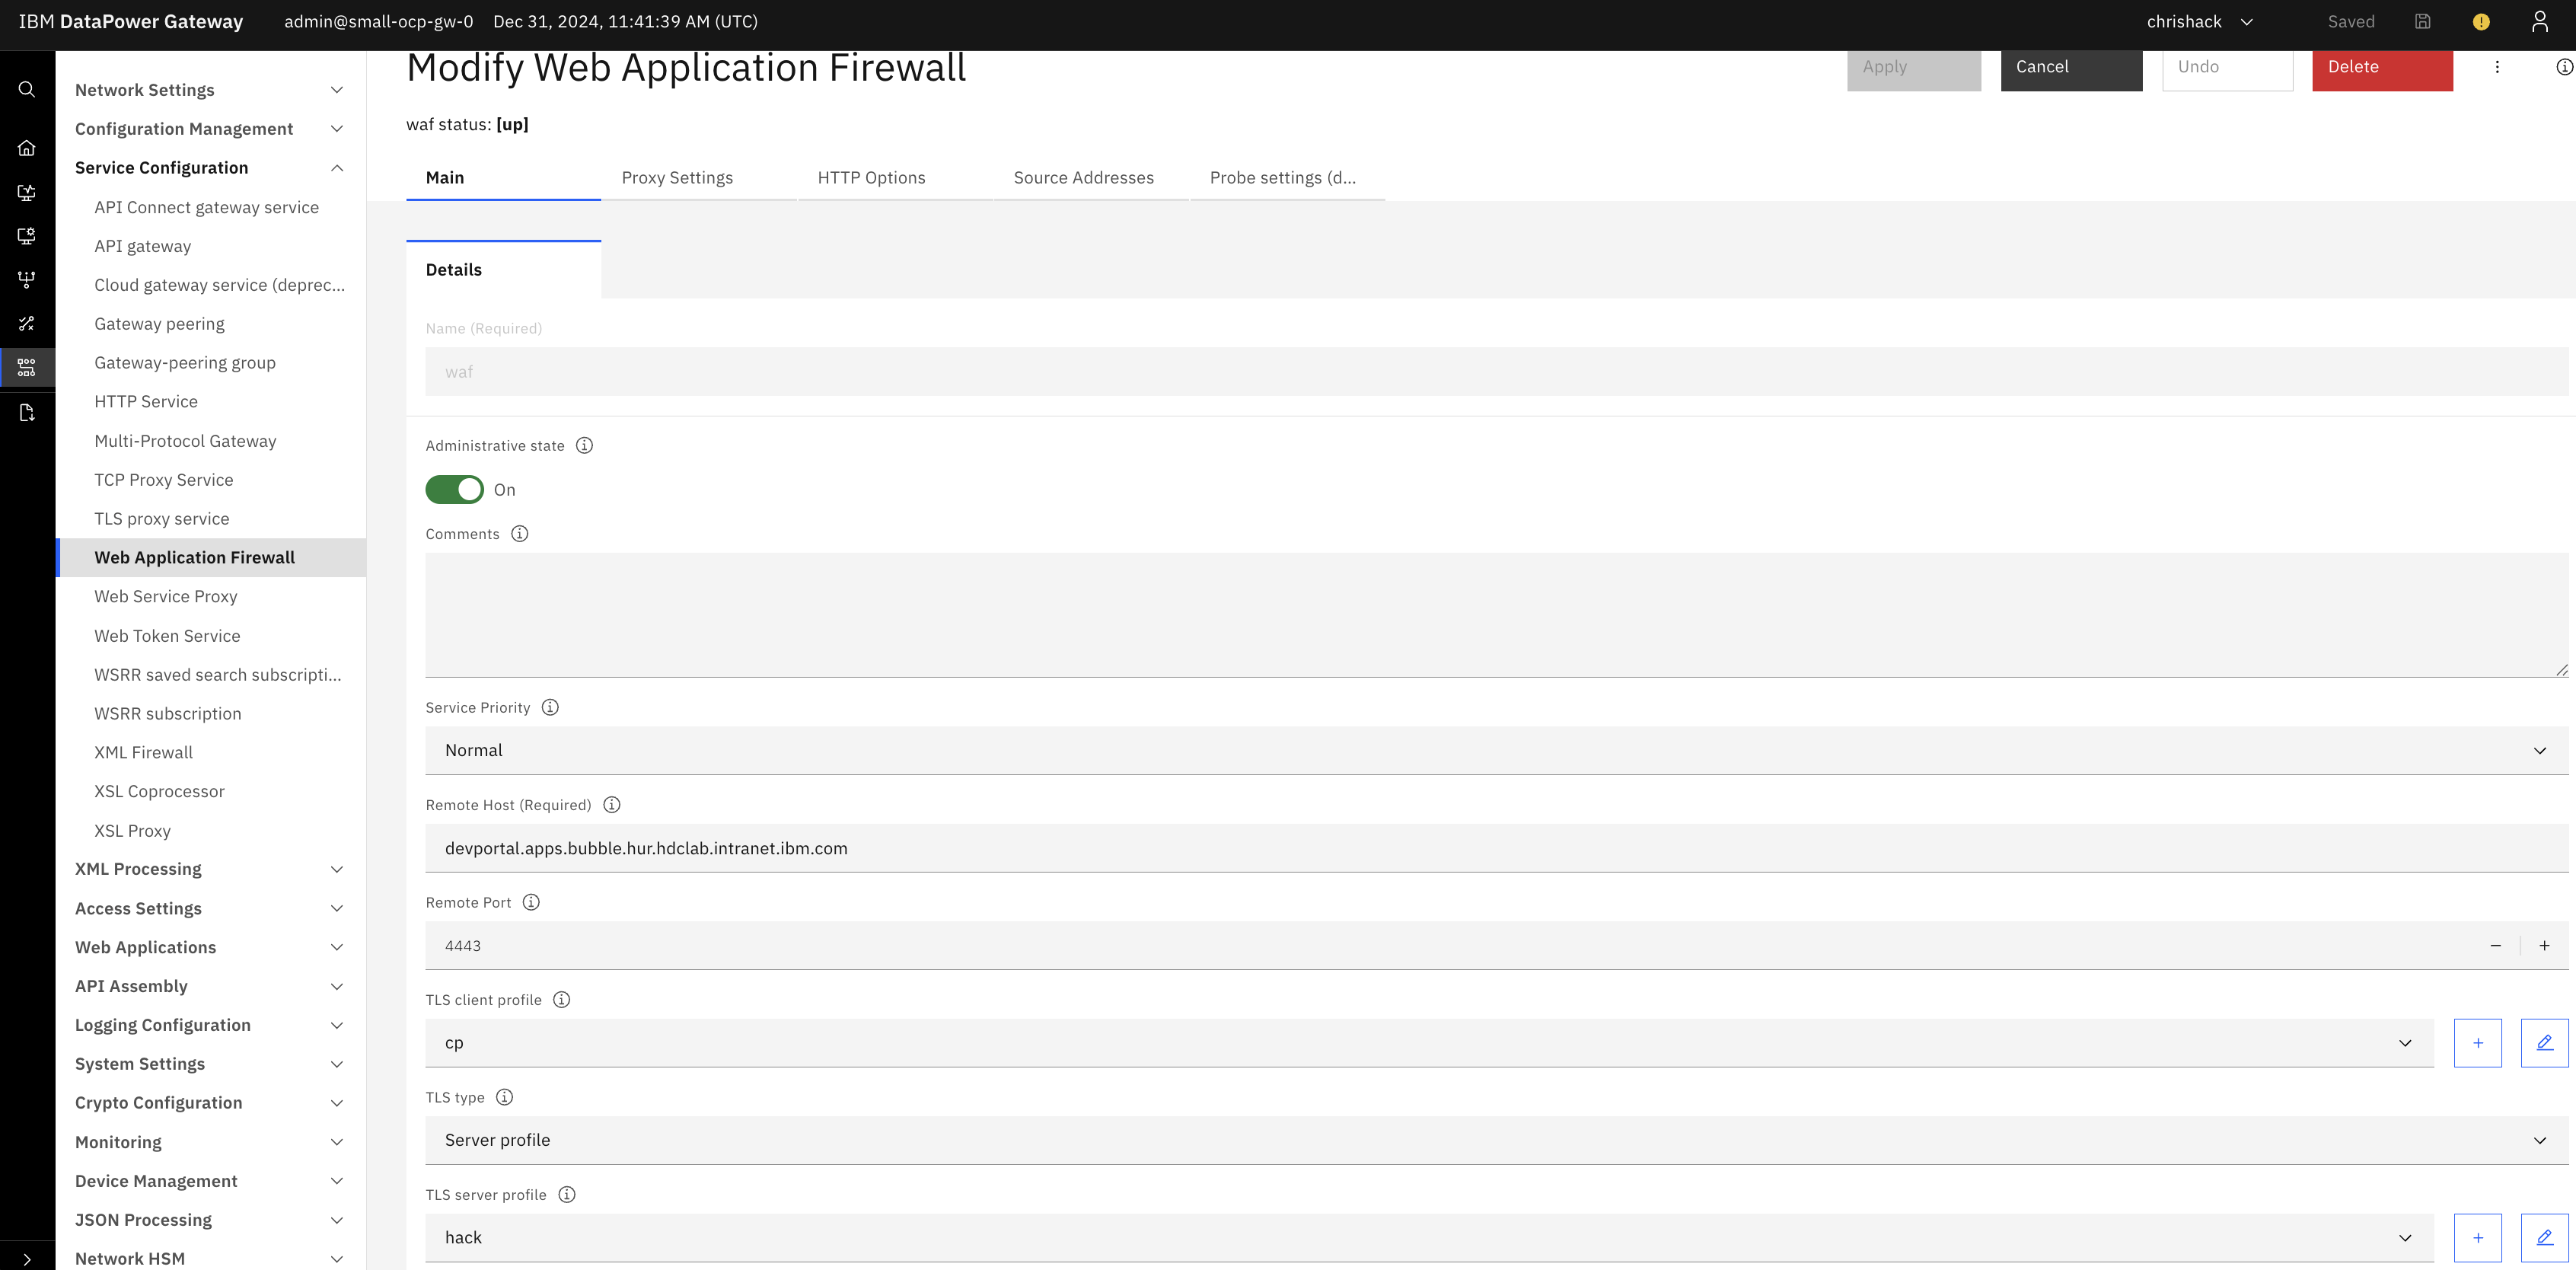
- Name - “Developer Portal WAF”
- Remote Host - IBM Developer Portal hostname used when deploying the IBM Developer Portal site.
- Remote Port - 443
- TLS Type - Sever profile
- TLS Server Profile - As configured in previous section
- TLS Client Profile - As configured in previous section
- Security Profile - As configured in previous section
- XML Manager - Set to default
- Set the following in Source Address, after clicking Add
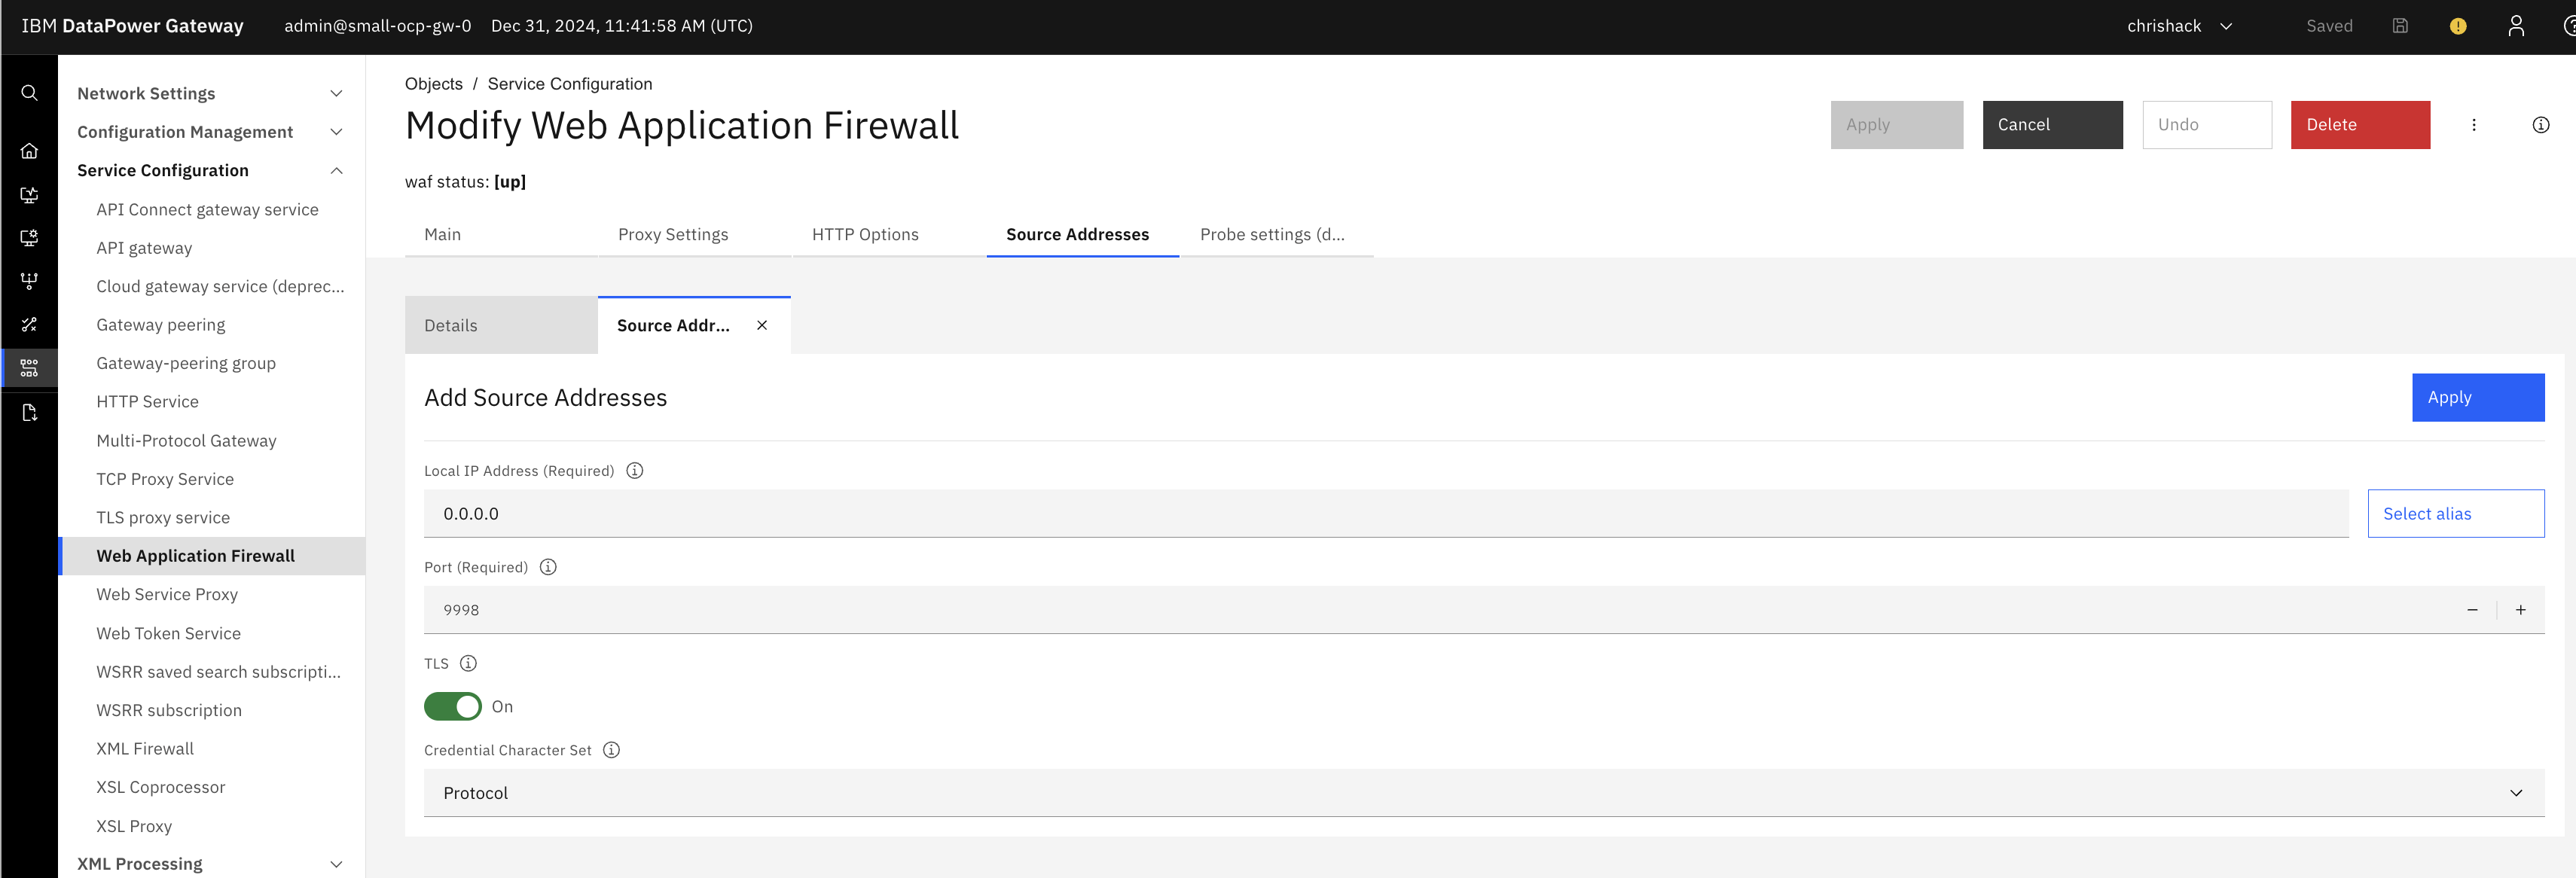
- Local IP Address - 0.0.0.0 (Please note this will allow connections from any interface and may not be desired)
- Local Port - Desired Port to listen to requests from, often 443.
- Enable TLS Click Apply to save the Source Address configuration
- Click Apply at the top of the screen to save the WAF