

WebSockets Part 2 - Securing with API Connect
•
by
Chris Phillips

DataPower provides the facility to proxy WebSocket connections. This article is part two of a three part guide consisting of
- Part 1 - How to create a WebSocket Proxy in DataPower
- Part 2 - How you can use API Connect to secure your implementation
Part 3 - How to socialise it via the Developer Portal giving your consumers the easiest- Part 3.1 - How to socialise it via the Developer Portal giving your consumers the easiest way to use your websocket
Please note this has only been tested with text based WebSockets.
DataPower is used to protect and proxy http connections. As a WebSocket is an upgraded HTTP Connection it allows DataPower to offer similar protection and proxying facilities. When a WebSocket connection is established with DataPower before the connection is upgraded it applies the MultiProtocol Gateway Policies. This means that additional logic can be applied to validate the request. In this series of articles we are going to be using API Connect for this.
In Part 2 we will go through how API Connect can be used to provide Authentication and Authorization for the WebSocket connection using the API Connect Security Definitions. When the WebSocket connection is made to DataPower, DataPower can run additional policies on the request. In this article we route to API Connect to validate the user can be Authenticated and Authorized.
Prerequisites
- WebSocket Proxy from Part 1
- WebSocket Client and Server application (The sample I use is here )
- API Connect 2018 Instance
The API works similarly to an Authorisation URL. The API must be secured with the same security that you want to have to secure the Web Socket. When the Web Socket is establishing the connection to the DataPower, DataPower sends a request to this API with the credentials and the API responds with 200, 400, 401 or 500
1. Create and Publish the API
This guide assumes you have experience creating and using APIs in API Connect 2018. There is a sample provided below that can be used as a starting point. This should be published to a catalog and the URl for the API should be recorded for future parts of this guide.
swagger: '2.0'
info:
  title: WebSocketAA
  x-ibm-name: WebSocketaa
  version: 1.0.0
  description: Used To Authenticate and Authorize WebSocket calls
schemes:
  - https
  - ws
basePath: /WebSocketaa
security:
  - clientID: []
securityDefinitions:
  clientID:
    type: apiKey
    in: header
    name: X-IBM-Client-Id
x-ibm-configuration:
  cors:
    enabled: true
  gateway: datapower-api-gateway
  type: rest
  phase: realized
  enforced: true
  testable: false
  assembly:
    execute:
      - set-variable:
          version: 2.0.0
          title: set-variable
          actions:
            - set: message.body
              value: SUCCESS
              type: string
    catch: []
  application-authentication:
    certificate: false
  activity-log:
    enabled: true
    success-content: activity
    error-content: payload
paths:
  /:
    get:
      responses:
        '200':
          description: ok
          schema:
            type: string
      consumes: []
      produces: []
host: small-gw-0-cp4i.apps.buttons.hur.hdclab.intranet.ibm.com
If you are using the sample a subscription is required, this is enforced by passing in a client id. You may choose to extend this so that a secret and/or Token or other Third Party security system. If that is case you need to ensure in the gateway script below we pass in the correct details to the API.
2. Call the API From DataPower
We now need to modify the DataPower Policy so that it invokes the API when the initial connection is made. When the connection is attempted prior to the upgrade DataPower will invoke the API with the required security details.
The sample below extracts the headers from the initial connection and proxies them on to the API call. If you have changed or extend the security requirements from the sample this will need updating.
If the API returns to DataPower a 200 then the connection continues and is upgraded. If 200 is not responded then a 500 is thrown. This is sample code that should be adapted to handle error scenarios as you need.
PLEASE NOTE YOU MUST HAVE AN SSL CLEINT PROFILE IN DATAPOWER CALLED apic-connection
var urlopen = require('urlopen');
var hm = require('header-metadata');
var myheaders = hm.current.headers;


var urlopen = require('urlopen');

var options = {
            target: 'https://small-gw-gateway-cp4i.apps.buttons.hur.hdclab.intranet.ibm.com/amit-porg/sandbox/small-gw-0-cp4i.apps.buttons.hur.hdclab.intranet.ibm.com/WebSocketaa',
            method: 'get',
           headers: hm.current.headers,
       contentType: 'text/plain',
           timeout: 60,
  sslClientProfile: 'apic-connection'
};
console.error('URL OPEN');
urlopen.open(options, function(error, response) {
  if (error) {
    // an error occurred during the request sending or response header parsing
    session.output.write("urlopen error: "+JSON.stringify(error));
  } else {
    // get the response status code
    var responseStatusCode = response.statusCode;
    var responseReasonPhrase = response.reasonPhrase;
    console.error("Response status code: " + responseStatusCode);
    console.error("Response reason phrase: " + responseReasonPhrase);
    // reading response data

      if (responseStatusCode != 200){
          hm.current.statusCode = responseStatusCode
          session.reject(responseReasonPhrase);
      }
  }
});
Please save the sample code to a file on your local file system. Before putting this sample into production you will need to configure error handling to your requirements.
2.1 Uploading the Sample Code
Uploading the Script
- Log into DataPower

- Upload the GatewayScript
- Click on File System storage
- Click on Actions to the right of local (feel free to use any path as long as you select the right file in 2.2)
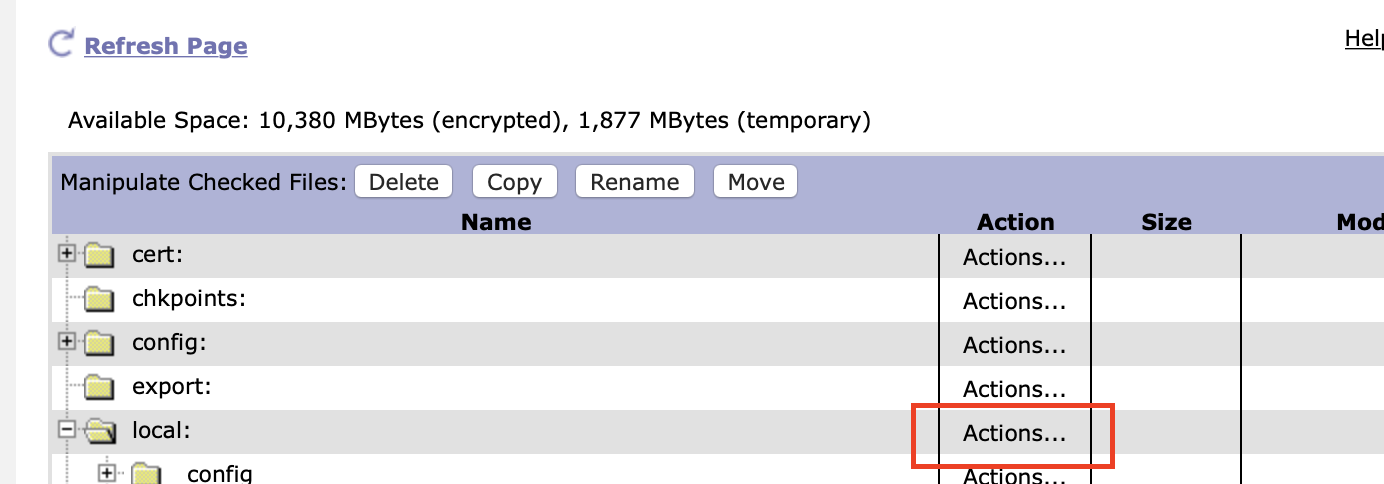
- Click on Upload files.
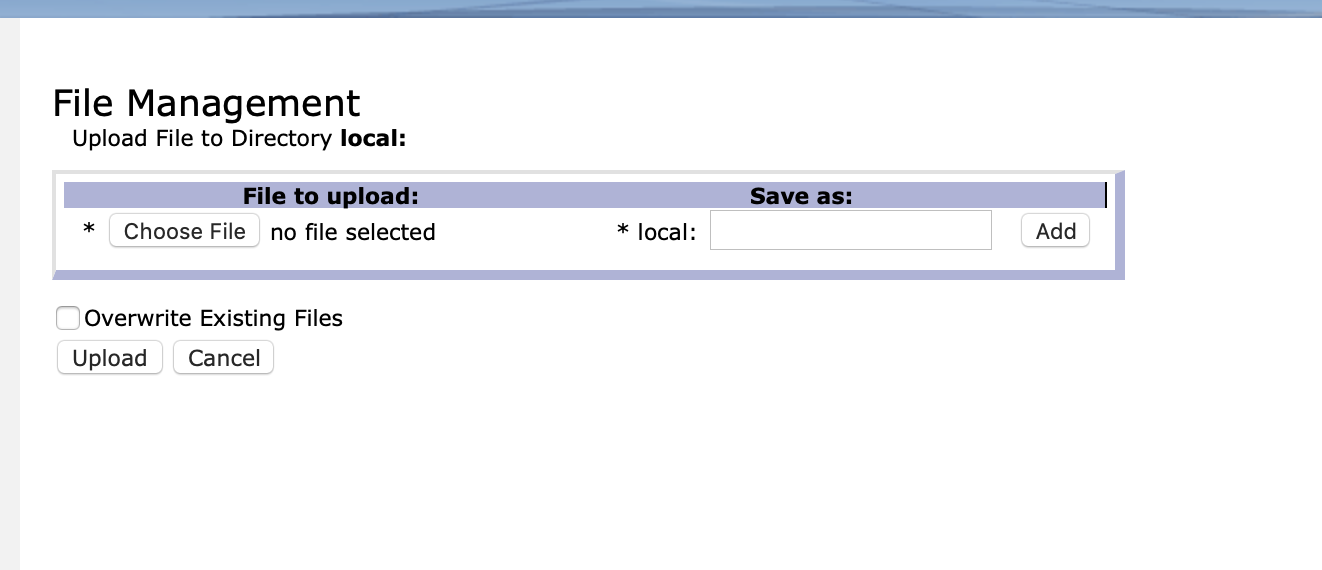
- Select the file containing the source above and upload it.
2.2 Creating the Policy
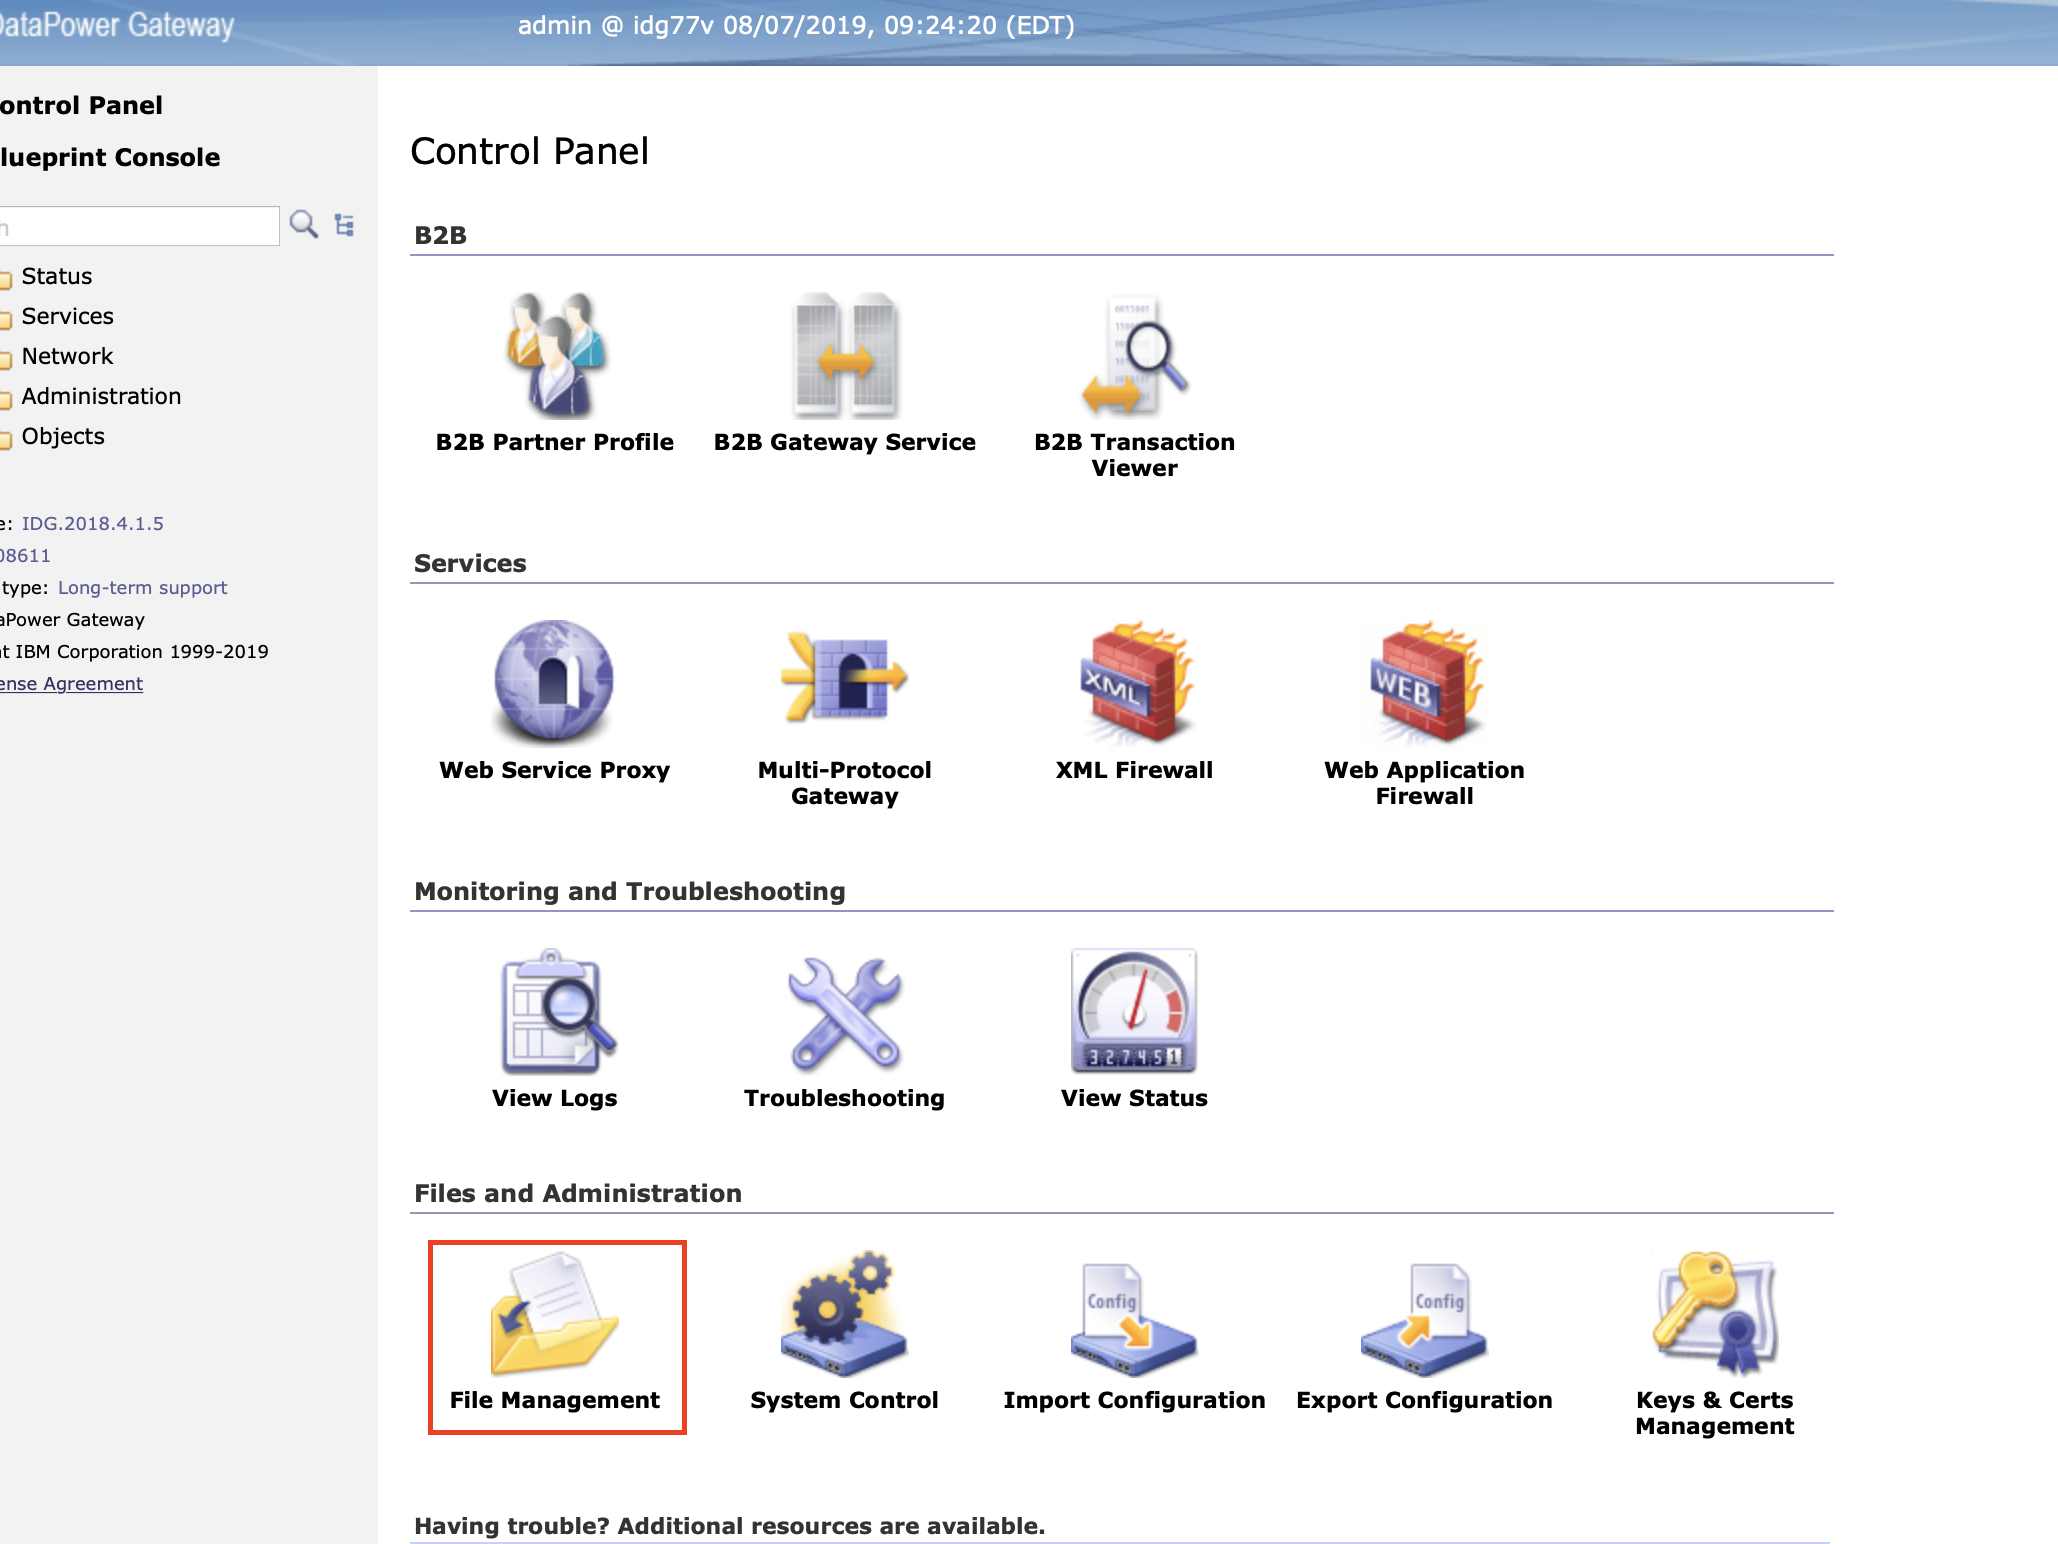
- Click on Control Panel on the top left
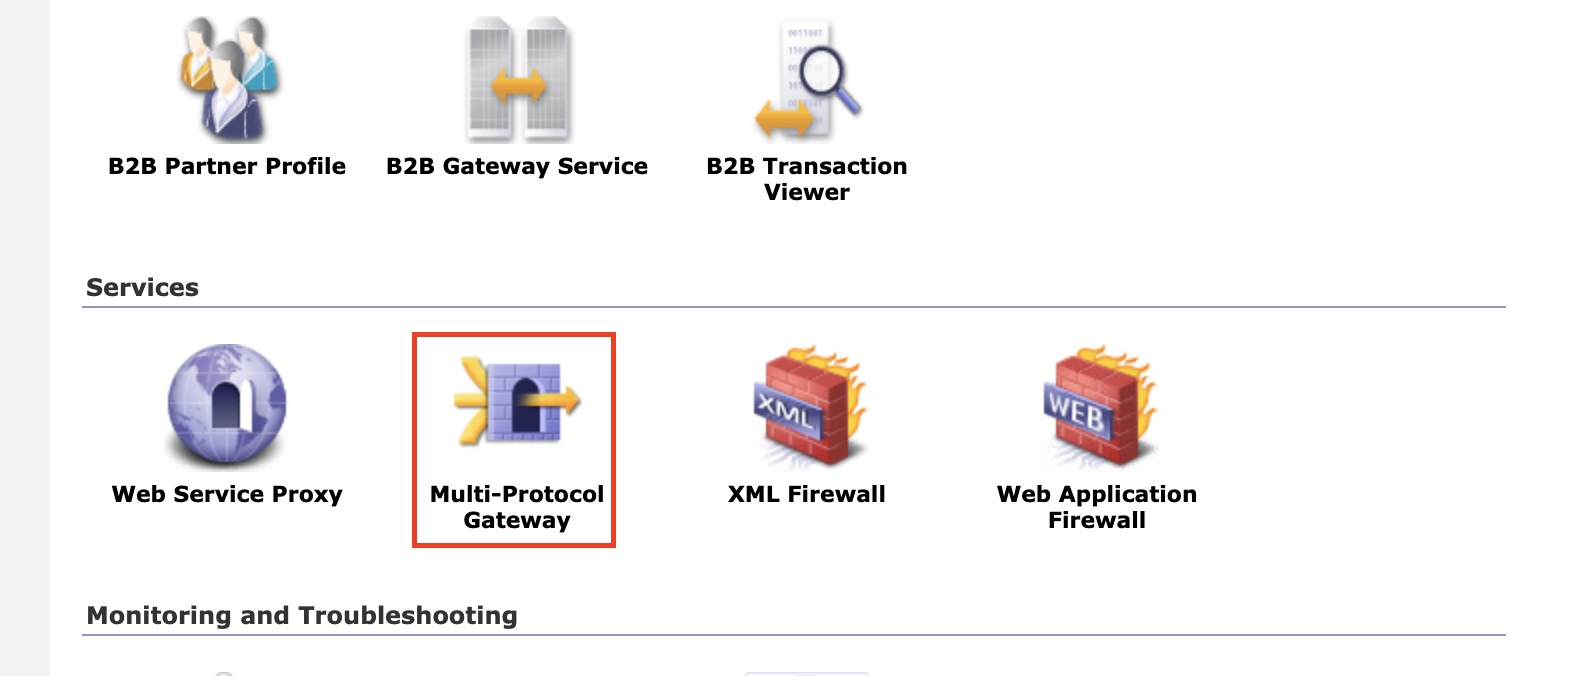
 2. Go to the Multi-Protocol Gateways
 3. Select the WebSocket MPG that was created in part 1
4. Click on the plus by Multi-Protocol Gateway Policy so we can create a new policy.
3. Select the WebSocket MPG that was created in part 1
4. Click on the plus by Multi-Protocol Gateway Policy so we can create a new policy.
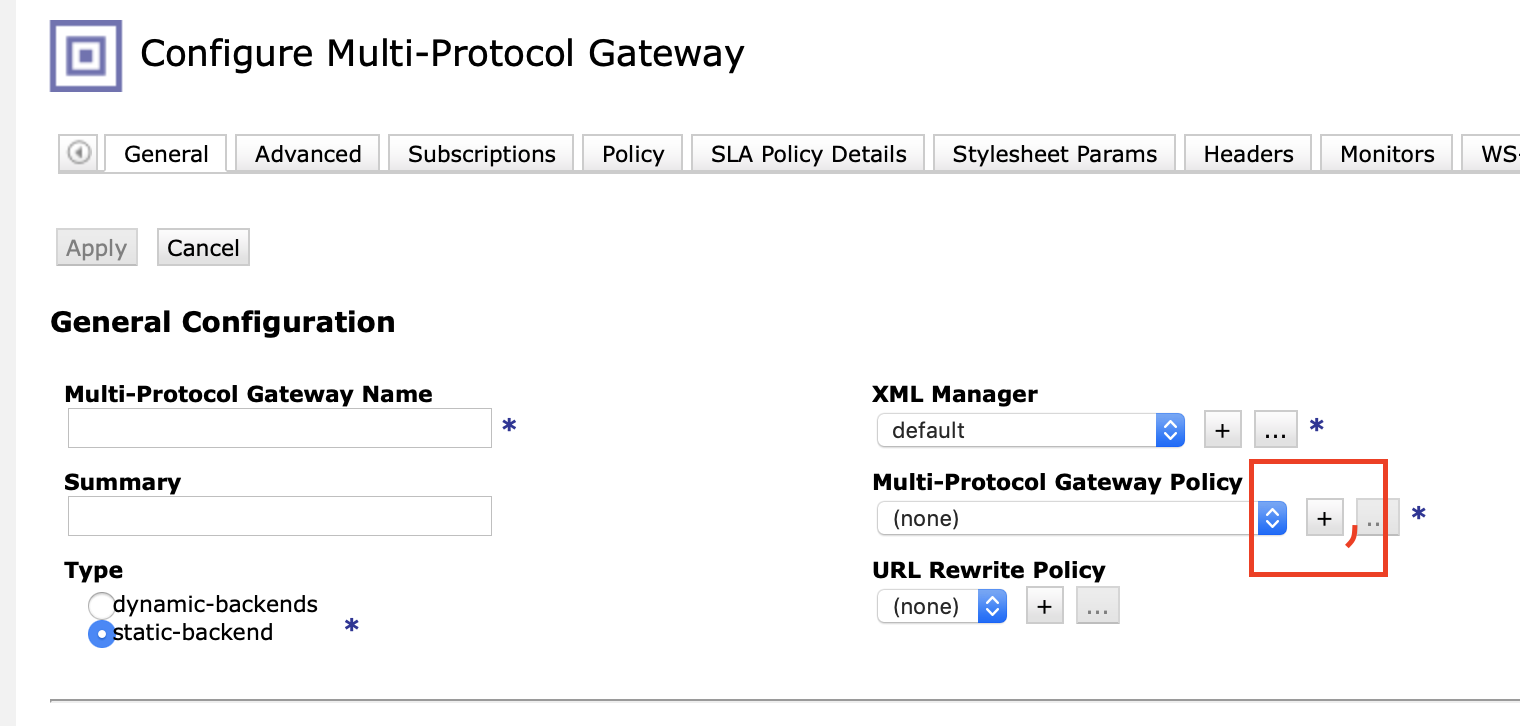 5. Give the policy a name and press Apply Policy
6. Create a new rule and change the rule direction to be
5. Give the policy a name and press Apply Policy
6. Create a new rule and change the rule direction to be Client to Server
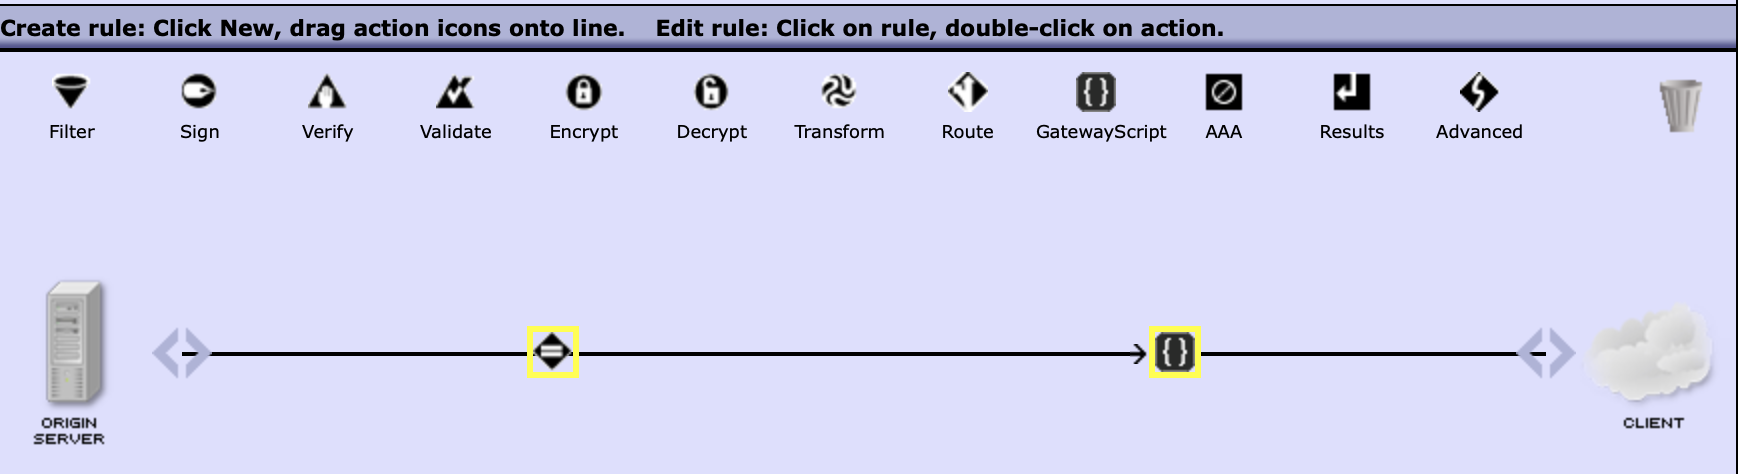
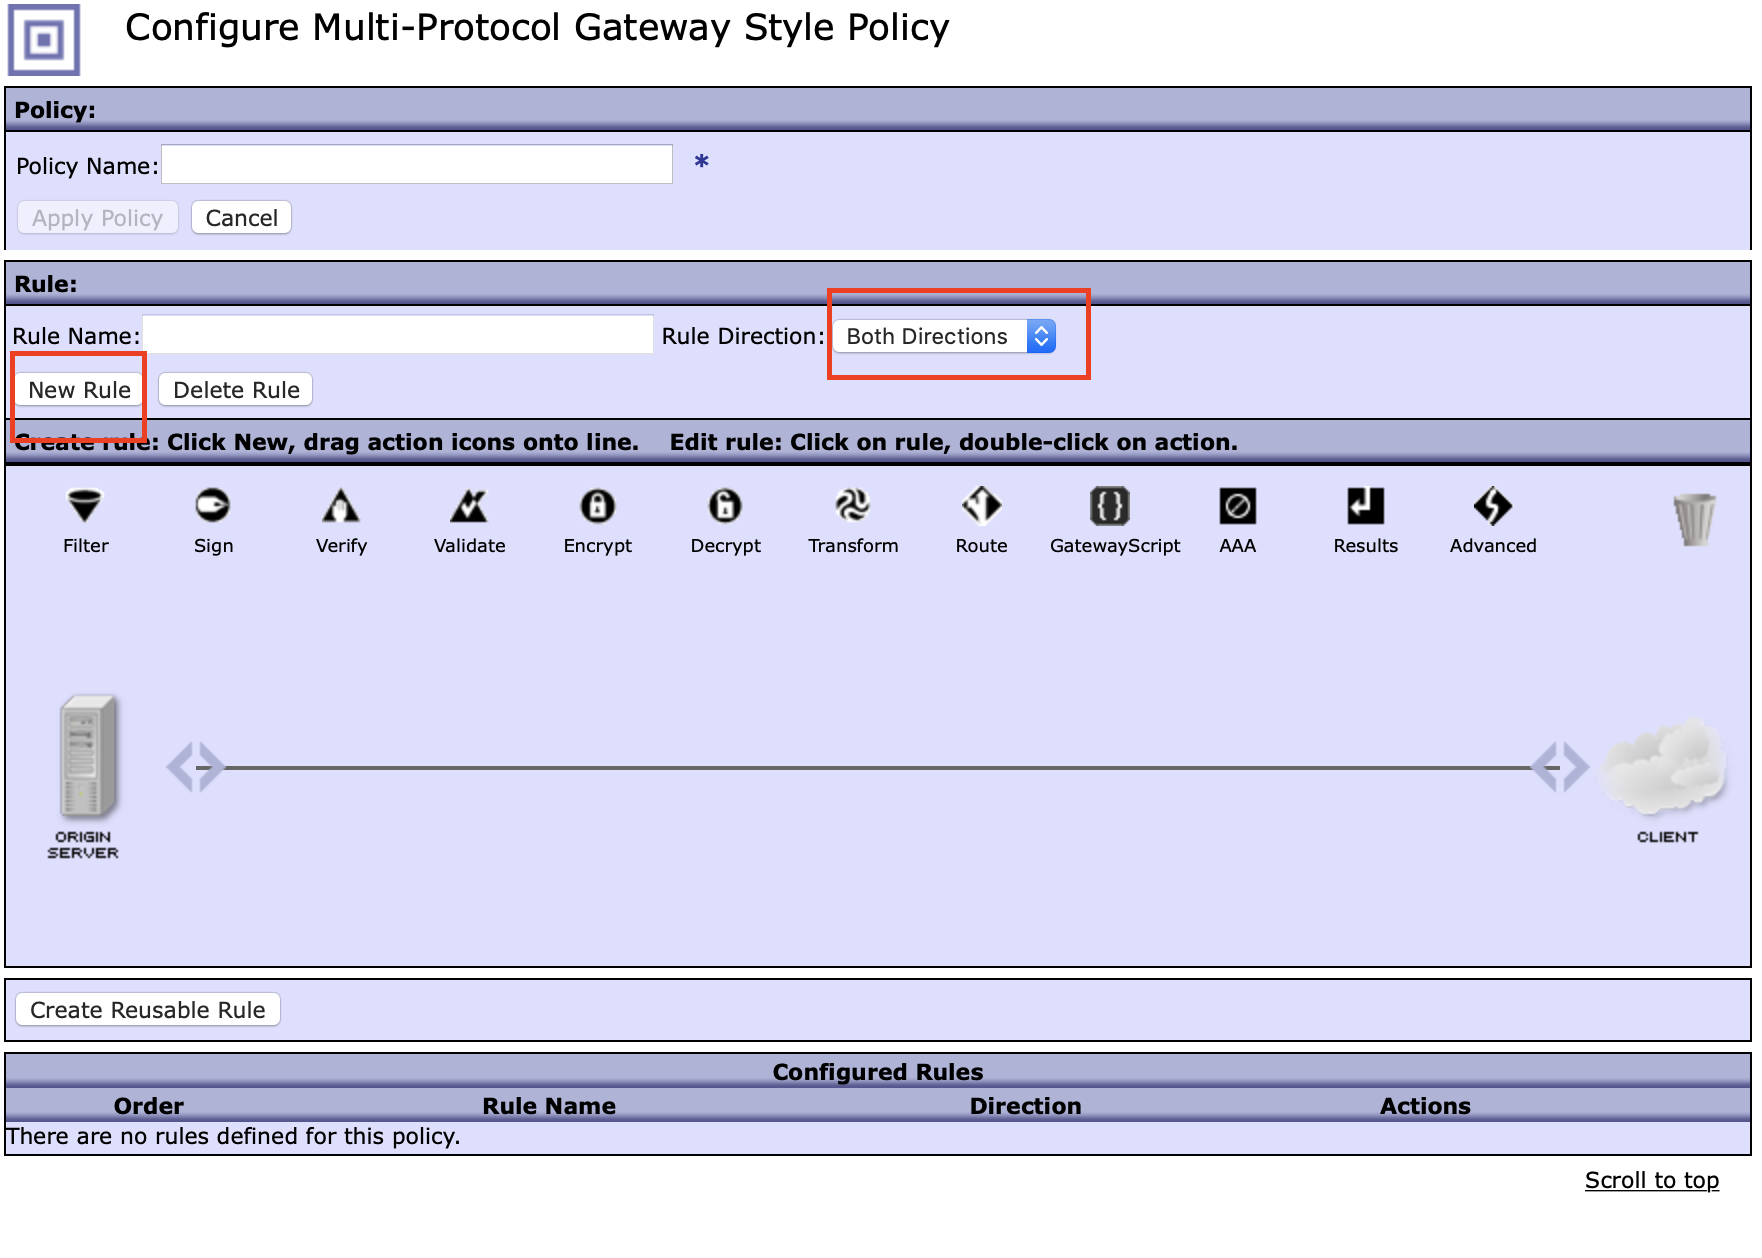 7. Drag a GatewayScript icon
  from the panel to the line after the match icon
  .
.
 8. Double click on the gateway script policy
9. Select the location of the GatewayScript file and press done
8. Double click on the gateway script policy
9. Select the location of the GatewayScript file and press done
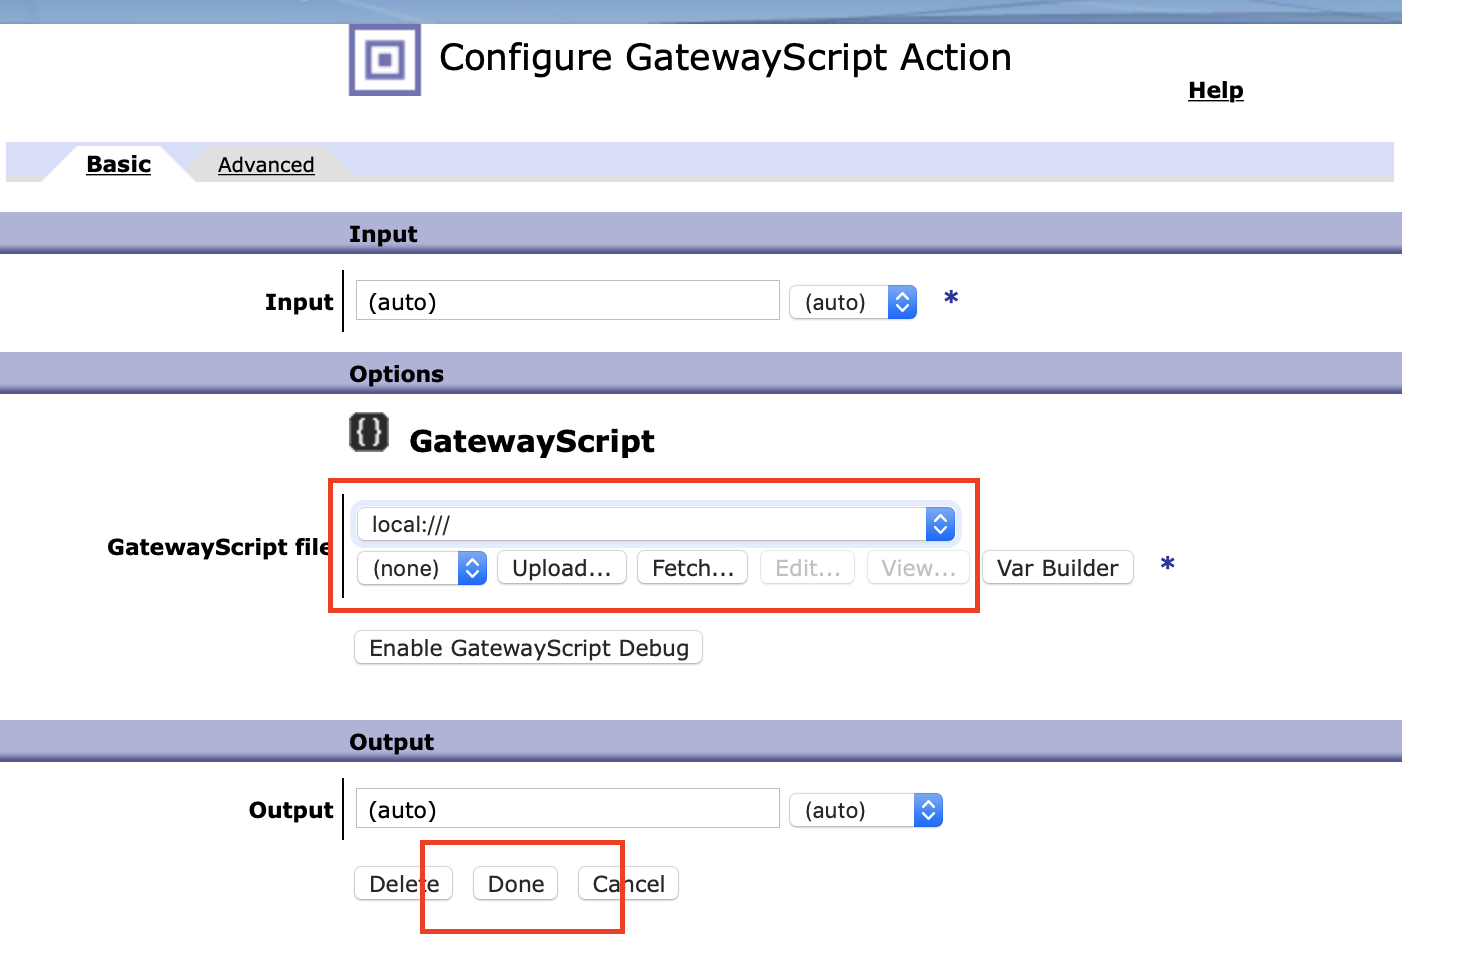 10. Press Apply Policy and Close Window
11. Press Apply
10. Press Apply Policy and Close Window
11. Press Apply
Test
To test this you need to ensure that the headers are set when creating the WebSocket connection. To use my sample implementation with the sample API set the x-ibm-client-id to the client id from step 1.
const connection = new WebSocket(url, {
  headers: {
    "x-ibm-client-id": "ID"
  }
})
My very basic WebSocket sample is available here